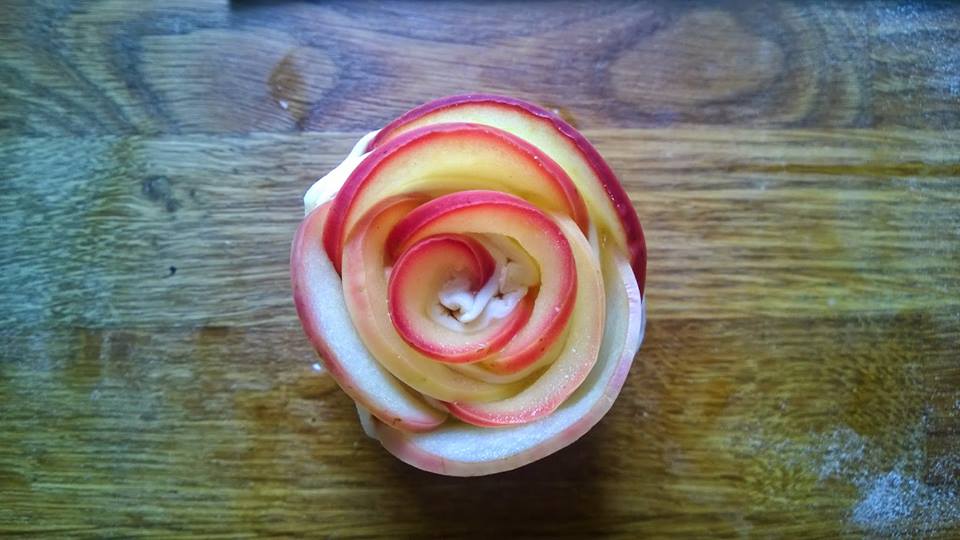
I don't think that cake pops need any special introduction. For me they are are a parents friendly way of measuring out your kids' sugar intake. One after lunch and maybe one more because they look at me really nicely and said that they are soooooo good :)  Still these can be really sweet. So my mind goes into overdrive. There must be a more kid friendly out there. The idea is to replace the middle of the pop with fresh fruit. My trusty friend Pinterest doesn't yield many results, which is surprising given the number of cake pop pins floating around there. Google isn't any better. Well I guess I'll have to be the test bunny (buhuhu ... not).

Select a fruit and cut it into appropriately sized pieces. I tried it with strawberries and bananas and both worked fine. You can also use whole strawberries, but choose smaller ones, otherwise your cake pops will be way too big and might fall off the stick.


Cut the fruit into rounds and then cut them into quarters or thirds. This should give you a decent sized base for the cake pops. Make the cake pop mix, which for me is some leftover chocolate cake, mixed with melted dark chocolate an mascarpone cheese. I am usually just eyeballing it with the ingredient amounts. If the mix falls apart in you hand, add more mascarpone or melted chocolate. If you can make a ball in your hand, the mix is just fine. If it feels too sticky, add more cake. Measure out the mix in your hand, make it into a ball and smash it down like a pancake. Place a piece of fruit on the pancake and then fold it around the fruit, making it into a ball. Roll it around you palms to seal any holes. Let the pops cool in the fridge.


Finish the cake pops as usual, first melting some chocolate, dipping a stick into it and securing it into the pop. Be more careful with the banana filled ones, since banana is more soft than strawberry or usual cake pop mix. Dip the cake pops into the chocolate and decorate. 


If you are feeling extra creative, use those whole strawberries and don't make the pops into balls, but instead just follow the natural shape of the strawberry, which will result in a cone shaped pop. This is a perfect base for a rose, since it is the same shape as a rose bud. The petals are made with white chocolate ganache using  ratio of 3 : 1 for chocolate : cream and a petal piping tip.


This is how this beauty looks from the inside ... mmmmm. It is not just healthier, but for my taste, it is definitely a more tasty version of the regular cake pop. I'll be definitely making these for my kids' next birthday.


Hiccup is still gonna need some time to look like himself and some serious cosmetic surgery (well actually just some extra time and practice), but at least I got Toothless flying this time. I was in a hurry and I am now kind of regretting putting Hiccup up there, but hey it is what it is and I will probably look at this some time in the future and hopefully consider it just a stepping stone.

For the pastel sky (which turned out great, but frankly does not even show now on these photos ... sad face) I first marbled some white and dark blue fondant. I then opted for the Sweetness and bite tutorial for the water-colouring, just because it uses dusts instead of liquid colour. My cakes tend to take forever to dry if I paint on them and I am not entirely sure why. Maybe it just always takes so long and I just didn't notice this when others wrote about it on their blogs. Given that our tastes are a bit different from American ones and I never use buttercream or ganache as filling and usually opt for more perishable fillings, I also refrigerate my cakes from start to finish, which I am sure is one of the reasons for long drying times. You really do not need a whole bunch of kids touching wet food colour :) Small kids' birthdays are messy enough as it is, so dusts it was.

My choice turned out to be as simple as it promised and I just dusted the cake with white dust food colour (edible one of course) using a big powder brush, applying more in some spots and just blending it out in horizontal strokes. 


My mom has been spoiling me with mangoes again. Not with those kind of greenish and hard, but with those fantastically red and soft mmmmmm. While they may be more common elsewhere, here you have to find a small grocer and look him really nicely. In return you'll get one of these beauties, while turning a blind eye at how much they are going to cost you. A cheaper and usually just as suitable solution would be to use canned mangoes, which work fine and can be always found at a local supermarket.

This will not be a typical mousse, mainly because of the added yogurt. It is just the right balance between sweet and fresh and just what you need on a warm summer afternoon. And is is super easy to make too.

For 6 servings:
2 mangoes
1 plain yogurt (180 ml)
1 cream (200 ml)
confectioner's sugar (to taste)
4 sheets of gelatin

Peel the mangoes and cut one whole and a half of the second into pieces. Leave one half whole for later. I already wrote about the easiest way  how to peel a mango, but it was in my Slovene blog. Even if you do know a word of Slovene (which I will assume you don't) the post is pretty self-explanatory, so no worries. Just be sure to position the mango correctly. The post however will only be helpful for the part where you need the pieces of mango. You'll still need to use a peeler or a knife if you want to peel the remaining half, which we wan to preserve whole. If a mango is nice and ripe, you could also just spoon it out of the peel.


Soak the gelatin sheets in cold water. Puree the mango and heat it up in a small pot. Squeeze the extra water from the gelatin and add it to the mango puree. Stir until the gelatin has completely dissolve. Let the puree cool to room temperature. Whip the cream with confectioners sugar (one spoon was enough for me) until firm peeks form and combine with yogurt. Once the puree is cool enough, add the cream-yogurt mixture and stir to combine. Leave in the fridge to set for a couple of hours.


If you want to serve this dessert as a cream, you can completely leave out the gelatin. 4 gelatin sheets or an equivalent in powder (approx 6 g or 2 tsp) is just enough for the cream become more mousse like and it holds its shape when spooned onto a plate. If you wanted to have more like a panna cota /jello style dessert, you would need to increase the gelatin amount, otherwise you will have trouble demoulding it on the plate. Establishing how much gelatin is just right was actually just a fluke, because this was all I was left with, after I forgot to buy on y last store trip. Yeah well "tudi slepa kura zrno najde". No idea what I am talking about?! It is a Slovene proverb, literally translated into "even a blind chicken find a grain", meaning that every once in a while everyone will get lucky. I certainly lucked out here, because this turned out super creamy and just like a mousse should be.

Spoon the mousse on the plate and decorate with slices of leftover mango.


Do not ask me how I stumbled upon this recipe. Pure coincidence may the the best way to describe it, yeah and too much Youtube. Way too much and before I knew I came from one random pregnancy vlog (and I am not even pregnant) to watching coconut fried shrimp recipes. I quickly scribbled down the recipe, stored it (which in my case means I lost and found it twice before actually preparing it) and remember I had it one afternoon after work.

I still insist on preparing a home cooked lunch at east a few times a week after we get home from work, however this used to be a bit more relaxed than it is now, because it needs to be prepared as quickly as possible. Not because of me and my husband, but because the boys are able to ask "when is it going to be ready?" for a billion time in a span of 20 minutes. Think of Donkey in Shrek 2. So the first conditions is that the meal needs to be quick and uncomplicated. Ok it may not be the height of healthy eating, but I'll consider it an indulgence and still allow it once in a while. And this is a seriously tasty indulgence.

The original recipe amounts seemed kind of off to me, because I wanted the batter to be somewhat thicker, so this is the adjusted version, which worked great for me.

For the beer batter:
1 egg
100 g flour
1 tsp baking powder
150 ml beer

Along with that:
a little extra flour
desiccated coconut
half a kilo shrimp (preferably with tail ends still on)
frying oil (I used peanut oil)

Mix all the beer batter ingredients in a bowl so that you get a batter that is a bit thicker than pancake batter (but think of crepes, not american pancakes). There will be enough batter for half a kilo of shrimp and you will have some leftover, but it is easier to work with this amount. If you made less, so that it would be just enough, it would be more difficult to have all the shrimp properly coated in the batter.

Dust the shrimp with flour, dip them in the batter and then roll them around in the coconut. You can choose not to flour them beforehand, but the batter sticks to the shrimp easier and more evenly that way. This is also the step, where you will appreciate having the tail ends of the shrimp still attached.


Fry them in oil, until they are dark golden brown.


We had them for lunch, so I also prepared some curry rice as a side dish, but an interesting debate started during lunch, because these seem to be a perfect party food snack. All that is missing is some dips and ideas were thrown around like curry or chilli or sour cream dip. The list started to get out of hand, so I resolved to leave this for another time. Thought about writing it down, but I think that might be a lost cause given my lost and found record. At least I have this blog to help me remember :)


Make way for Noddy! Noddy! He toots his horn to say beep, beep, beep. Make way for Noddy! Noddy! Come on out to play! ... oh the memories. This was a regular at our house for some time way back (ok, ok, not that far ago, it may just be that it seems to me that way) and I think that there is a case of that kind of amnesia going on with this one, similar to the one related to birth or early days of newborns. You know when you forget the hard and painful and not so pleasant parts and replace them with fonder one. So while I may go "oooooh" now, when I hear this, I am sure I was going "ooooooh no" at some point from overdosing on the same cartoon over and over again.

But now this theme song hasn't been heard for some time, since the boys are a bit bigger now and I find myself in the worlds of Star Wars, Slugterra and similar weird creatures. The little one might even still be of "Noddy age", but since he worships his older brother like a king, he too now demands "teja, teja". It took me a while and in his mind probably waaaaay too far, to figure our that I need to search Youtube for these slugs.

Well anyway as I am a part of a charity organisation that bakes charity cakes for disabled and underprivileged, it is nice to sometime get an order for a cake that features a character that is unlikely to be demanded from my boys. It was an added benefit that my older one remembered Noddy immediately and said that I made a beautiful cake. And here I go again ... oooooooooh


Calling all chocoholics and coffee addicts!

Chocolate and coffee have always been BFFs, so it was a no brainer what to make for my husband's birthday, who cannot get up in the morning without a cup of coffee. Well he will get up, but his brain is left behind somewhere curled up in a bed upstairs.

A small sugar fix in the morning is also right up his alley, so I came up with this super easy recipe for a treat that combines both. Soooo I didn't really invent something special, since this is just dark chocolate ganache with coffee, but still ... these were actually my beginnings or better yet beginnings of a blog, which I started a little over a year ago (the original one, where I write in my language).

If you disregards the time that it takes for the ganache to thicken, it takes 10 minutes to make these small bites - 5 minutes to make the ganache and 5 minutes to form the truffles.

For approx. 20 truffles:
100 ml cream
200 g dark chocolate
3 tsp instant coffee
bitter cocoa

Chop chocolate in small chunks and put it into a bowl. Pour your cream into a small pot and heat it up to boiling point ( do not boil it), remove from stove and mix in instant coffee until it has completely dissolved. Pour the cream over the chocolate and let it sit for a few minutes.

Mix the cream and chocolate until the chocolate is melted and the mixture is completely smooth. If not, heat it in a microwave for additional 15 - 30 seconds and mix until there are no hard pieces of chocolate left.


Cover the mixture with a foil, so that the foil touches the mixture. By doing so you prevent the mixture from crusting and then you don't end up with hard chocolate pieces in your truffles. You will loose a bit of the ganache when you peel of the foil, but it is really a small amount and I wouldn't worry about it. It is much nicer to have an even smooth mixture that lets in your mouth. Leave the mixture on a counter overnight or if you are in a hurry stick it in a fridge, but it will not thicken evenly as it would on a counter. It will become harder on the edge of the bowl and stay softer in the middle, so I would mix it a couple of times during cooling; you do not need to mix it, if you leave it on the counter. Leaving it overnight also has the added benefit that the coffee flavour can develop over time. You will taste the coffee much more the next day than when you initially mix it in, so don't overdo it.

When the mixture has thickened, you can it into truffles. You will know it is thick enough, when you can spoon a bit in your hand and form it into a ball shape. It won't thicken so much that you can form a perfect ball, but you can certainly make a ball like shape, kinda more rustic looking. If it does not want to thicken enough, put it in the fridge for a bit and try again. Roll the truffles in bitter cocoa. You can also use sweet cocoa, but the bitter one goes so much better with the coffee mixture.

If there are any left that need storing (not likely ... :) ), store them in the fridge, but leave them at a room temperature before serving again.


It happens sometimes that you are left with an ingredient from a different recipe, which may be quite specific. The other day I had some condensed milk lying around from making key lime pie. While condensed milk may be more common in American kitchens, we don't use it that much in European kitchens. Well at least I don't ... not to anger any Europeans who may be more familiar with it :)

I made raffaello balls before, but it was a long time back and I only remember that the main ingredient was powdered milk. Given that I don't normally stock powdered milk (hell I wouldn't even know where to look for it in a supermarket) I decided to try my own version of these sweet coconut bites.

I knew that if you mix powdered milk, confectioners sugar and water, you actually get a homemade version of condensed milk, so it shouldn't be that difficult to recreate something similar. In the spirit of experimentation I went through my kitchen and found some white chocolate, which helps everything stick together.

For 14 bites:
10 g butter
80 g condensed milk
80 g white chocolate
60 g grated coconut + a little extra for rolling the balls

Melt butter in a pan over the stove or in a microwave and ad to the condensed milk. Melt white chocolate in a microwave or in a double broiler.


Mix contents of both bowls together. The mixture will become very thick, actually it will seize, but this time it is ok (in any other case, seized chocolate will give me nightmares). Add coconut, mix well and let cool in a fridge for about 30 minutes.


Take the cooled mixture, form little balls and roll them around in leftover coconut. Work quickly, since the longer you handle the balls, the stickier the mixture will get. Store them in a fridge (if there is any leftover). Even though in the end they do not taste anything like raffello, mine were gone in an instant.