Prikaz objav z oznako kids. Pokaži vse objave


It's my baby's birthday! I really would not be me, if I didn't take advantage of the fact that he has not yet reached that stage where he starts getting weird or elaborate ideas of what kind of cake he wants for his special day. I have no doubt that next year will be different. So his star sign is right in the between leo and virgo, but if you knew him, he is definitely a leo. So why not make a lion cake for my little lion?

I quickly typed "lion cake" into Pinterest, but I really didn't get any "wow" ideas with the exception of this cake, which is totally insane. But the thing is that as much as I love working with fondant, because it is a great medium for this kind of masterpieces, no one in my family really likes it (does anyone like it?!), so I try to challenge myself and create cakes without fondant. How about chocolate?

So, step one - three types of ganache! Dark chocolate ganache (use ratio of 2 : 1 for chocolate : cream), milk chocolate ganache (ratio of 2,5 - 3 : 1 for chocolate : cream) and white chocolate ganache (ratio of 3 : 1 for chocolate : cream). Ganache will need some time to cool and thicken, especially in the summer temperatures, so in the meantime, let's go to the next step - defrost leftover cake.

When I bake I always have some leftover cake. Usually it is the top of the cake, which I remove to get the cake completely flat. What do you do with it? Please don't say you throw it out. OK it is partially acceptable if you eat it, but if you bake a lot, these leftover tend to pile up. Regardless of the amount, I just wrap it in plastic wrap and store it in the freezer and then use it later to make cake pops. So ... defrost the cake, crumble it into small pieces and add some mascarpone cheese or melted chocolate. The amount of extra ingredients to add varies depending on the cake I use, some are a bit dryer and may need more, some are more moist and may need less; I just go by my feeling. Mix everything together, I just use my hands and squish the mix until it kind of resembles modelling clay.
Print out a photo or a sketch of what you are modelling, just make it as big as your model. This way it is a great reference for proportions and final look. And let the modelling begin ...


At this point, a warning ... learn from my mistakes. The lion face was kind of heavy in the end and it sagged the cake on one end, when I put it on top. The cake luckily didn't collapse or fall apart and in the end all was well. Even better, because of the sagging the muzzle sat more low on the cake and the proportions were more realistic this way. Nevertheless, think about one of the following preventative measures:

1. leave the cake to sit a couple of hours in the fridge, even better over night; I was in a hurry and I decorated my cake immediately after assembling it. 

2. use support; model the face on a cardboard and support it with straws; basically like assembling a tiered cake.

I frosted the cake in a thin first layer of ganache, only the snout and the eyes are fondant. The mane is dark ganache, piped with the grass tip (tip # 133). Because the head is so irregular in shape, it was harder to smooth out the ganache, but I managed and then put another layer of ganache with a brush. Because I used a brush, the ganache seemed more fur like.


And the reaction? He cried. No, not from excitement or joy. Apparently this little monster was too realistic for a 3-year old and he needed a minute to calm down. I think it helped that his older brother started picking of the chocolate mane :) In the end I was happy with how the cake looked and I made it up to the little guy with the next cake (link soon, check back soon!).


If a friend asks me to make a cake for their kid's birthday I would always go out of my way to make that wish come true. Partly it's just because of my nature and the impulse to please others and partly because of the fact that I just don't get around to making as much cakes as I would wish, at least not such that are more intricate and with figurines. In a 4 people household there are still only 4 birthdays a year and only two of those require a kid cake. Unless I succumb to the temptation and make myself one as well.

So when I learned that this cake was needed just two days after we get back from our 2 week Boston trip, I wasn't exactly thrilled, but I just didn't have it in me to say no. I just hoped that the jet lag won't be too bad and I compromised a little. The cake can be made in advance and frozen, the dinosaur was also finished before we left, so this left me with a day and a half to defrost the cake, make the filling and frosting, finish the cake and cover it in fondant. I would have wanted some more time, but hey not all orders are perfect. 

The extra request on this one? It had to be dairy free. My usual vanilla sponge recipe is dairy free anyway, because it uses oil instead of butter (same as here, just triple the amounts for a standard size cake). For the filling I usually use coconut whipping cream (same as in my Tropicana cake), adding dairy free melted chocolate or chocolate chips to get a chocolate or Stracciatella variation.

The dinosaur was just a matter of current inspiration, but it seems that I was sneaking peeks at my boys' latest cartoons, because this dinosaur turned out a bit like Arlo from the Good Dinosaur, don't you think? 


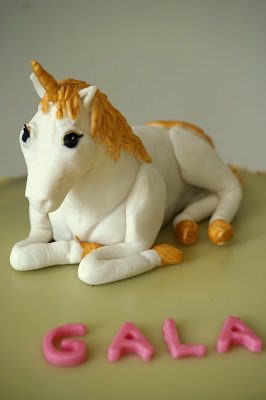
If you say unicorn, I think off all thing pretty, sweet and happy - warm colours, hearts and rainbows. I was in a time crunch with this one, so there was no time for any rainbow-ish add-ons. Istead I opted to cover the sides of the cake with rainbow coloured small sugar pearls, which was just fine because not everyone is a fan of fondant. Two birds with one stone so to speak. 

And even my horses are getting better ... yey :)


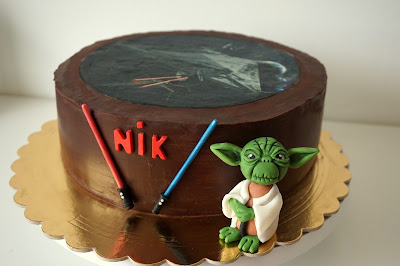
I am not a Star Wars fan. Not even in the slightest. Actually I have not seen any of the movies.  None. Zero. But at the same time I don't know anybody who would not recognise at least some of the characters of this franchise. Even me. Maybe it is because of the Darth Vader costume that my son chose for last masquerades (which is kind of like our version of the Halloween) or because of the lightsabers that we haaaaad to get (seriously it was like their lives depended on it).

So if a kid wants a Star Wars cake, I think of exactly that: lightsabers and Darth Vader. Oooh and Yoda of course. But my extensive knowledge ends there.

Although I was already provided with a rice paper transfer of some sort of space ship (I am telling you I am clueless), I couldn't resist adding a few of details, to make the cake feel more mine.

Sweet little Yoda looks complicated to make, but it really isn't, take my word for it. I sometime struggle with a character, which just would not look like I want it, but Yoda is luckily still so popular that someone tackled this task before me and was kind enough to give a step by step tutorial on how to do it. A nice Dutch girl, who uses the name the Cake Duchess, was of immense help to me and her tutorial was super helpful.


I opted to only ganache the cake without any fondant and here is the final result. In the word of Yoda: "Cute cake, this is. Yes, hmmmmmm."


Human features are notoriously hard to master in fondant. I usually rather do a simple face and body, and I still have a Craftsy video on standby, if only a day would have more hours. But if a kid asks for a Real Madrid soccer cake, complete with Ronaldo, then you find yourself looking at a Ronaldo picture way too much time for your liking. So I did my best and hoped that the children's imagination transforms this guy into a Ronaldo look-alike (which I am pleased to report it did :) )

Add a soccer ball and the logo of the team and you have a truly great soccer cake.


I don't think that cake pops need any special introduction. For me they are are a parents friendly way of measuring out your kids' sugar intake. One after lunch and maybe one more because they look at me really nicely and said that they are soooooo good :)  Still these can be really sweet. So my mind goes into overdrive. There must be a more kid friendly out there. The idea is to replace the middle of the pop with fresh fruit. My trusty friend Pinterest doesn't yield many results, which is surprising given the number of cake pop pins floating around there. Google isn't any better. Well I guess I'll have to be the test bunny (buhuhu ... not).

Select a fruit and cut it into appropriately sized pieces. I tried it with strawberries and bananas and both worked fine. You can also use whole strawberries, but choose smaller ones, otherwise your cake pops will be way too big and might fall off the stick.


Cut the fruit into rounds and then cut them into quarters or thirds. This should give you a decent sized base for the cake pops. Make the cake pop mix, which for me is some leftover chocolate cake, mixed with melted dark chocolate an mascarpone cheese. I am usually just eyeballing it with the ingredient amounts. If the mix falls apart in you hand, add more mascarpone or melted chocolate. If you can make a ball in your hand, the mix is just fine. If it feels too sticky, add more cake. Measure out the mix in your hand, make it into a ball and smash it down like a pancake. Place a piece of fruit on the pancake and then fold it around the fruit, making it into a ball. Roll it around you palms to seal any holes. Let the pops cool in the fridge.


Finish the cake pops as usual, first melting some chocolate, dipping a stick into it and securing it into the pop. Be more careful with the banana filled ones, since banana is more soft than strawberry or usual cake pop mix. Dip the cake pops into the chocolate and decorate. 


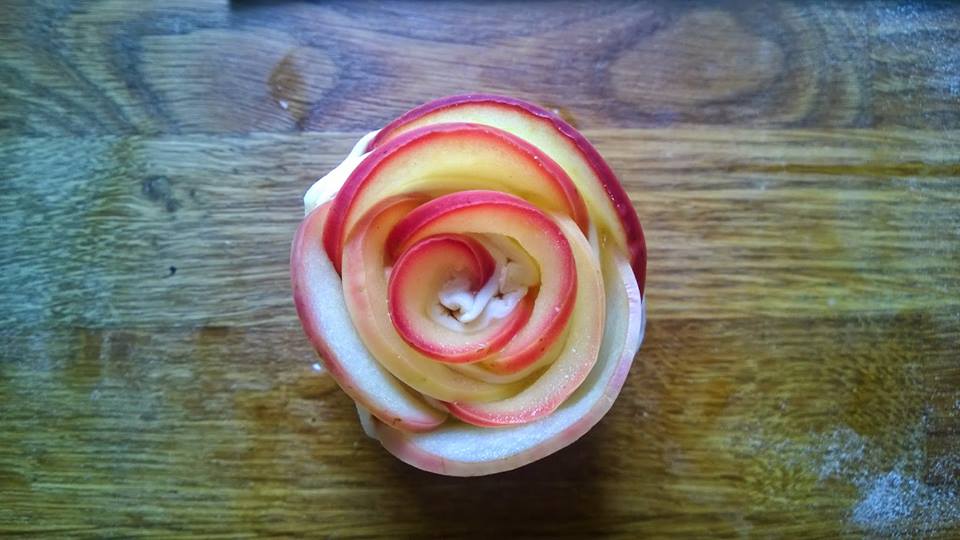
If you are feeling extra creative, use those whole strawberries and don't make the pops into balls, but instead just follow the natural shape of the strawberry, which will result in a cone shaped pop. This is a perfect base for a rose, since it is the same shape as a rose bud. The petals are made with white chocolate ganache using  ratio of 3 : 1 for chocolate : cream and a petal piping tip.


This is how this beauty looks from the inside ... mmmmm. It is not just healthier, but for my taste, it is definitely a more tasty version of the regular cake pop. I'll be definitely making these for my kids' next birthday.


Hiccup is still gonna need some time to look like himself and some serious cosmetic surgery (well actually just some extra time and practice), but at least I got Toothless flying this time. I was in a hurry and I am now kind of regretting putting Hiccup up there, but hey it is what it is and I will probably look at this some time in the future and hopefully consider it just a stepping stone.

For the pastel sky (which turned out great, but frankly does not even show now on these photos ... sad face) I first marbled some white and dark blue fondant. I then opted for the Sweetness and bite tutorial for the water-colouring, just because it uses dusts instead of liquid colour. My cakes tend to take forever to dry if I paint on them and I am not entirely sure why. Maybe it just always takes so long and I just didn't notice this when others wrote about it on their blogs. Given that our tastes are a bit different from American ones and I never use buttercream or ganache as filling and usually opt for more perishable fillings, I also refrigerate my cakes from start to finish, which I am sure is one of the reasons for long drying times. You really do not need a whole bunch of kids touching wet food colour :) Small kids' birthdays are messy enough as it is, so dusts it was.

My choice turned out to be as simple as it promised and I just dusted the cake with white dust food colour (edible one of course) using a big powder brush, applying more in some spots and just blending it out in horizontal strokes. 


I made a bunch of sea creatures for the Sea theme cake of my little one. Most of them are really easy to make, so let's just start. First up - starfish, shell, seahorse and octopus.

STARFISH

Roll out the orange fondant around half a centimeter (around 1/5 inch) thick. Then take the star cutter and cut out little stars.  You will get better results, if you use a plastic wrap as described below. That way the star won't be thick at the edges, which will slope down.

The difference - left is cut out with cling film, right one without
Just place the cling film over the rolled out fondant and use the cutter over the film. You will need to press down a bit harder than usual,but the shape will be a lot prettier than otherwise. Draw the mount and the eyes with a toothpick or a modelling tool. Make little holes all over the star's body with a toothpick to give it a textured look.


Put a bit of white and black fondant into the eye sockets to make the eyes.


SHELL

Roll out the fondant; how thick depends on the size of the shell you are making. Cover with cling film the same as with the starfish and cut out 2 circles. Because you are using the film, they will have a dome shape. 


Flatten the back of the shell with your finger, so that we can later glue together the bottom and top part. Use a knife or a modelling tool to draw lines over the top. Repeat with the other half.


Leave the shell to dry at least a bit so that it won't lose its shape, when you turn the bottom half, but it should also not be completely dry, because it will be harder to glue together the bottom and top half. In the meantime shape two little balls out of white fondant and add black fondant dots (or just draw them with a black food marker) to make the eyes. Attach the eyes with a drop of water and add the top half, attaching it at the flattened back again with a bit of water.


SEAHORSE

Shape the fondant into a roll and leave a bit on the sided. Roll your finger to make part of the roll thinner; approximately a quarter  of a way from the top and a quarter from the bottom. Bend the top quarter down and shape it into a tear drop shape to form a head.


Roll out the bottom quarter to make a thinner roll and roll it into a spiral. Shape most of the leftover fondant into a ball and flatten it with the modelling tool to the fin and attach it to the body with a bit of water.


Draw a mouth and an eye socket with a modelling tool and add some white and black fondant for the eye. Roll out the rest of the leftover fondant, cut out a small strip and use small scissors to make the edge jagged. This will be the horse's mane, which you attach with a bit of water. 


All that is left now is to make the body scaly looking. The easiest way is to take a round piping tip and imprint little scales over the horse's body. You must hold the tip a little tilted so that it leaves half circles in the fondant instead of circles.


OCTOPUS

Shape a ball and then roll it out. Pinch the oval shape in the middle to make an eight shape. Cut and divide the bottom part of this shape into the tentacles. 


Imprint the mouth and the eye sockets with a toothpick or a modelling tool and add the eyes the same way as with other little creatures. My octopus was supposed to be sitting so I bent the head part vertically and let it dry in this position.